Shadow Milk Cookie stands among the rarest characters in Cookie Run: Kingdom. This magical beast-type cookie truly stands out from the rest.
This remarkable character’s design features powder blue dough that catches everyone’s eye. His most striking feature is his heterochromia—distinctive eyes in different colors that perfectly match his theatrical jester-like appearance. Players love knowing how to use their true damage abilities in the arena. The character’s background as Pure Vanilla Cookie’s Soul Jam’s previous owner adds another layer of intrigue to his story.
Our kitchen creation captures this character’s mysterious essence. The recipe transforms this visually stunning cookie into a real-world treat. The swirling patterns we’ve designed mirror the character’s chaotic and enigmatic nature. Your baking adventure starts here!
What Are Shadow Milk Cookies?

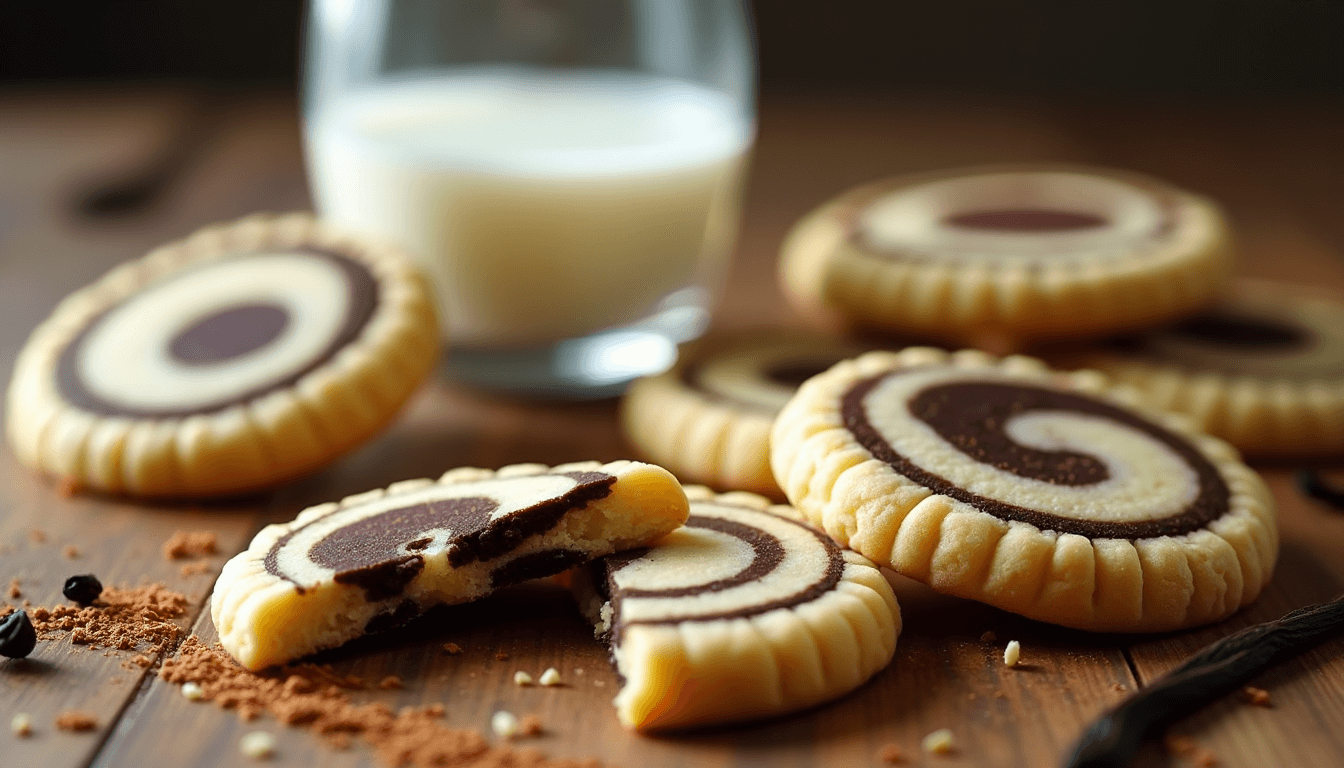
Let me share this creative recipe for Shadow Milk Cookies – a delightful twist on traditional cookies with an enchanting marbled pattern that combines light and dark dough. These cookies show off beautiful swirls that make them a treat for both your eyes and taste buds.
What makes them unique?
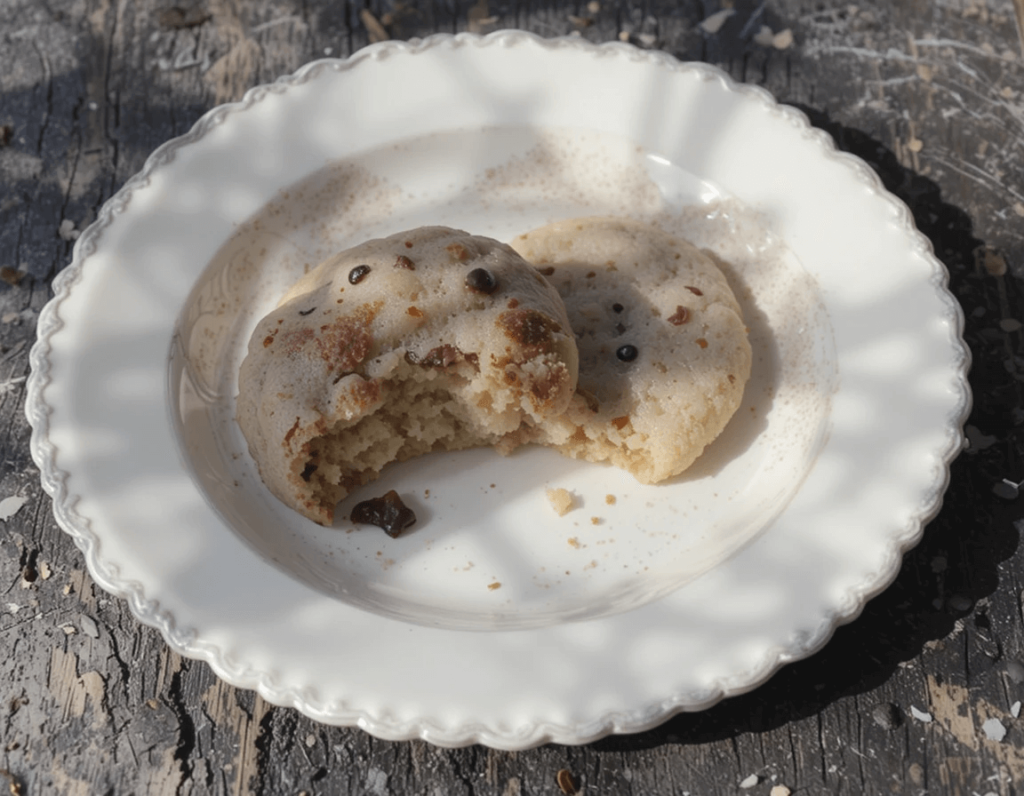
Shadow Milk Cookies stand out with their eye-catching appearance. The swirls of vanilla and chocolate dough create an elegant marble pattern that everyone notices. You’ll love the texture – crispy on the outside with a wonderfully soft center that melts in your mouth.
Each batch of these cookies turns out differently because of the marbling technique. The dark chocolate swirls against the creamy vanilla base lifting these cookies from simple treats to artistic creations.
Origin or inspiration behind the name
The name comes from how the dark swirls seem to cast shadows across the lighter dough, creating an almost 3D effect. The milk in the recipe makes them rich and incredibly soft.
This artistic swirling technique has roots in traditional marble cake making. Now we’ve brought that classic method to cookie baking, creating treats that look dramatic and taste amazing.
Why you’ll love this recipe
Shadow Milk Cookies are a great way to get started with your next baking project:
- Simple Process: These cookies might look fancy, but they use simple baking techniques. The marbling effect just needs a gentle swirl – anyone can do it.
The recipe is forgiving and perfect for:
- First-time bakers
- Family baking projects
- Creative kitchen experiments
On top of that, these cookies work great for:
- Holiday gatherings
- Gift-giving
- Special occasions
- Everyday treats
You can do so much with Shadow Milk Cookies beyond the simple recipe. Try changing the light-to-dark dough ratio, creating new patterns, or adding mint or orange extract to the base recipe.
The dough stays stable while baking, so your artistic swirls stay clear and beautiful. The cookies develop a subtle shine in the oven, making them look even more impressive.
Vanilla and chocolate flavors blend perfectly to create a taste everyone loves. The milk gives them a tender crumb structure, and the right amount of butter makes them melt in your mouth.
These cookies stay fresh for several days when stored properly. You can make them ahead of time or bake them in big batches. Their unique looks and delicious taste have made them a hit at bake sales, cookie exchanges, and holiday parties.
Ingredients and Tools You’ll Need
Let me show you how to make these magical Shadow Milk Cookies. You’ll need the right ingredients and tools ready to make your baking experience smooth and enjoyable.
Essential ingredients
For the base cookie dough, you’ll need:
- 2½ cups all-purpose flour
- 1 cup granulated sugar
- ¾ cup unsalted butter (room temperature)
- 2 large eggs
- ½ cup whole milk
- 1 teaspoon vanilla extract
- 2 teaspoons baking powder
- ¼ teaspoon salt
For the shadow effect, set aside:
- ⅓ cup unsweetened cocoa powder
- 2 tablespoons extra milk (for dark dough)
Optional add-ins
You can improve your Shadow Milk Cookies with these creative additions:
- Dark chocolate chips
- White chocolate chunks
- Crushed walnuts or pecans
- Ground cinnamon
- Almond extract
- Orange zest
These cookies are incredibly versatile. You can try different combinations of add-ins to create your unique version. The classic version looks elegant with its simple contrast of vanilla and chocolate dough.
Kitchen tools required
You’ll need this simple equipment:
- Two medium-sized mixing bowls (for light and dark dough)
- One large mixing bowl
- Electric mixer or stand mixer
- Measuring cups and spoons
- Rolling pin
- Cookie cutters (2-3 inch diameter)
- Baking sheets
- Parchment paper or silicone baking mats
- Rubber spatula
- Wire cooling rack
These special tools will help you get professional results:
- Pastry scraper (for clean dough separation)
- Cookie scoop (for consistent sizing)
- Offset spatula (for smooth dough handling)
Your oven should keep a steady temperature between 350-375°F (175-190°C) for the best results. Make sure your ingredients reach room temperature before you start, especially the butter and eggs. This will give you better dough consistency.
Line your baking sheets with parchment paper or silicone mats to prevent sticking and get even browning. Having everything ready before you start will make the process more enjoyable and quick.
Keep your dry ingredients in airtight containers until needed. Let the butter and eggs sit at room temperature for about 30 minutes before use. This helps ingredients blend smoothly and creates that perfect marbled effect we want.
Clean and dry all your tools well before use and keep your workspace tidy. This makes it easier to keep the light and dark doughs separate, which gives you those striking shadow patterns that make these cookies special.
Step-by-Step Instructions to Make Shadow Milk Cookies
These marbled treats combine light and dark dough to create stunning visual effects. Let’s take a closer look at how to make them step by step.
Step 1: Preparing the Dough (Mixing dry and wet ingredients separately, combining properly)
Start by combining butter and sugar at low speed. Beat the mixture at medium speed until it becomes light and fluffy – you’ll need about 4 minutes. Add the eggs one at a time, then mix in the vanilla extract. The flour should go in gradually until it’s fully mixed in. The dough might feel sticky, but that’s exactly what you want for the right texture.
Split the dough into two equal parts. Take one half and shape it into a disk or square on plastic film. Mix cocoa powder into the second half to create the dark dough, then shape it the same way on another piece of plastic film.
Step 2: Creating the Shadow Effect (Swirling light and dark dough together)
The doughs need to chill in the freezer for 30-45 minutes. This step is vital because it makes the dough easier to handle and keeps those beautiful swirl patterns distinct. Roll out each chilled dough separately on parchment paper until it’s about ⅛ inch (3mm) thick.
You’ll want to layer one dough over the other to create perfect swirls. Make sure the doughs are cool enough to work with but not too cold – this helps them stick together nicely. Press the layers together gently with a rolling pin.
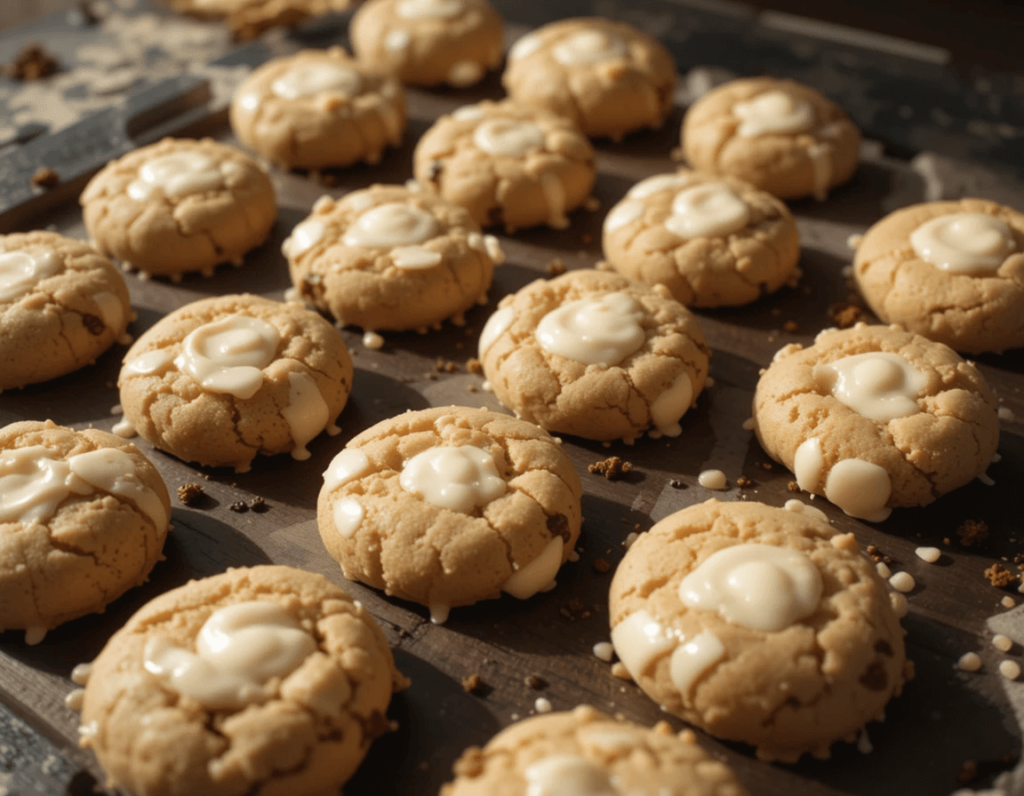
Step 3: Shaping and Baking (Rolling out, cutting shapes, proper baking temperature and time)
The swirl intensity depends on how you roll the dough. Put the long side in front of you for fewer swirls and more cookies. The short side will give you more pronounced swirls but fewer cookies.
Use the parchment paper to help you roll the dough tightly into a cylinder. Pop it back in the freezer for 10 minutes if it gets too warm while you’re working.
Cut the chilled dough cylinder into slices about ⅕ inch (5mm) thick. Space these slices 2 inches (5cm) apart on your baking sheet since they’ll spread while baking.
Set your oven to 350 degrees Fahrenheit (180 degrees Celsius). The cookies need about 10 minutes in the oven – watch for slight color changes around the edges. Look for these visual signs rather than just timing them.
Let the cookies rest on the baking sheet briefly before moving them to a cooling rack. This short rest helps keep them intact and preserves those beautiful swirls.
Tips for Perfect Shadow Milk Cookies
Creating perfect Shadow Milk Cookies takes specific techniques and an understanding of common pitfalls. These expert tips will help you get professional-looking results every time.
How to get the perfect swirl effect
The secret to stunning swirls depends on temperature control and proper handling. You’ll need to keep both doughs at different temperatures – the vanilla dough should be slightly warmer than the chocolate dough. This temperature difference naturally creates marbling as the dough blends.
For optimal swirling:
- Roll each dough separately to a uniform thickness
- Layer them carefully and press gently to bond
- Use slow, steady motions to create swirls
- Don’t overwork the dough so patterns stay distinct
Your marbling will get better with practice. Start with simple swirls and try more complex patterns as you build confidence. Clean lines between light and dark dough create that striking shadow effect these cookies are famous for.
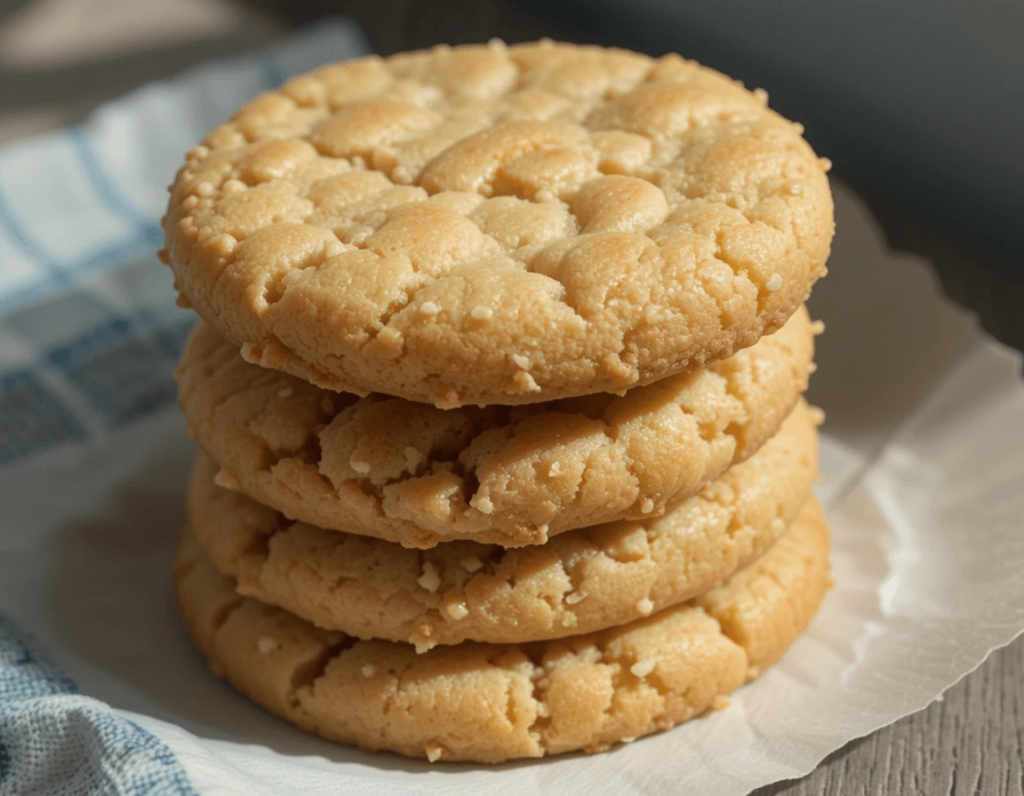
Achieving the right cookie texture
A perfect Shadow Milk Cookie should have crispy edges and a tender center. Room temperature ingredients are vital to get this balance right. The butter should be soft enough to leave a slight indent when you press it but not melted.
For soft-centered cookies:
- Cut baking time by 1-2 minutes
- Pull from oven when edges set but center looks slightly underdone
- Let cookies cool completely on the baking sheet
For crispier cookies:
- Add 1-2 minutes to baking time
- Watch for light golden edges
- Move to cool rack right after baking
Common mistakes to avoid
Learning about potential risks helps ensure success:
Dough consistency issues:
- Tough cookies come from overmixing
- Uneven swirls result from undermixing
- Wrong flour measurement makes dough dry or sticky
Temperature-related problems:
- Warm dough creates muddy patterns
- Cold dough cracks while rolling
- Uneven oven heat causes inconsistent baking
Swirling mistakes:
- Hard pressing blends colors completely
- Light pressure stops proper bonding
- Too much handling softens butter
Chill dough between steps if it becomes too soft to handle. Space cookies properly on baking sheets to prevent spreading into each other and preserve their unique patterns.
Note that getting the perfect balance of textures needs attention throughout the process. Focus on simple techniques before you try intricate designs. Each batch gives you a chance to improve your skills and create more beautiful Shadow Milk Cookies.
Serving and Storing Shadow Milk Cookies
Shadow Milk Cookies are more than just baked goods – they’re edible art that needs special care in how you serve, store, and create variations.
Best ways to serve
A glass of cold milk makes these cookies taste amazing and creates a perfect flavor balance. The milk’s opacity adds to the cookies’ mysterious look, which makes them great with afternoon tea or coffee.
Here are some gift presentation ideas:
- Package in decorative boxes with fluorescent accents
- Create custom gift sets with themed accessories
- Arrange in tiers for special occasions
How to store for freshness
The right storage method will help your cookies keep their unique look and taste delicious. Let them cool completely before putting them in airtight containers. You’ll get the best results if you:
- Layer cookies between sheets of parchment paper
- Store at room temperature for up to 5 days
- Keep away from direct sunlight to protect the contrast between light and dark portions
You can freeze the cookies for later:
- Wrap individual cookies in plastic wrap
- Place in freezer-safe containers
- Store for up to 3 months
- Thaw at room temperature before serving
Fun variations to try
Let’s look at some creative ways to make your Shadow Milk Cookies even more special:
Seasonal Decorations: These cookies can match any occasion with themed elements. Add subtle touches that work with the marbled look without overwhelming it.
Flavor Combinations: Mix up the taste with these complementary flavors:
- Add matcha powder to the light portion
- Mix orange zest into the dark dough
- Try mint extracts
Texture Enhancements: Give your cookies extra character with these additions:
- Sprinkle sea salt on top before baking
- Add crushed nuts between layers
- Mix chocolate chips into the dark portions
Shadow Milk Cookies are more than treats – they show how baking becomes art. Each batch is a chance to try new decorating techniques and flavor combinations while keeping their signature look.
These versatile cookies work great for holidays and celebrations. You can serve them at casual snack times or formal events.
Shadow Milk Cookies combine artistic expression with delicious baking perfectly. Their marbled appearance makes them unique, and simple baking techniques make them available to bakers of all skill levels.
Your success with these cookies relies on temperature control and proper dough handling. Each batch gives you a chance to improve your technique and try new patterns, which makes the baking process rewarding.
These treats work well for many occasions – from casual snacks to formal gatherings. The cookie’s visual appeal and taste last for days with proper storage and creative presentation. You can start baking these stunning cookies today and add them to your recipe collection permanently.
1 thought on “How to Make Shadow Milk Cookies: A Step-by-Step”